Most people hesitate to take up a DIY project that involves cutting wood. There are many reasons for this — they don’t know the kind of cuts they should make, the tools they should use, or the steps they should follow. Luckily, we’ve got everything covered.
Before you cut wood, you need to determine the kind of cut that you want and the best type of saw to to achieve it. Once you’ve trimmed the wood to square the edges, measure it, marking the waste side of the wood. Then make the cut. Continue to adjust until you have the dimensions you want.
There are many ways you can go about wood-cutting. Let’s take a look at the different methods, the tools you need, and the kind of cuts you can make. We’ll also look at how you can measure the wood and a step-by-step guide to cutting the wood.
How Do You Cut Wood?
There are many ways to cut wood, both with and without a saw. Without a saw, the best way to cut it is to use a sharp-edged tool that can slice through the timber.
For raw or milled timber, you can use cutting tools like knives, grinders, drills, chisels, and axes. You also have the option of using a machete, a hatchet, a serrated knife, an angle grinder, or a wire.
What Supplies Will You Need?
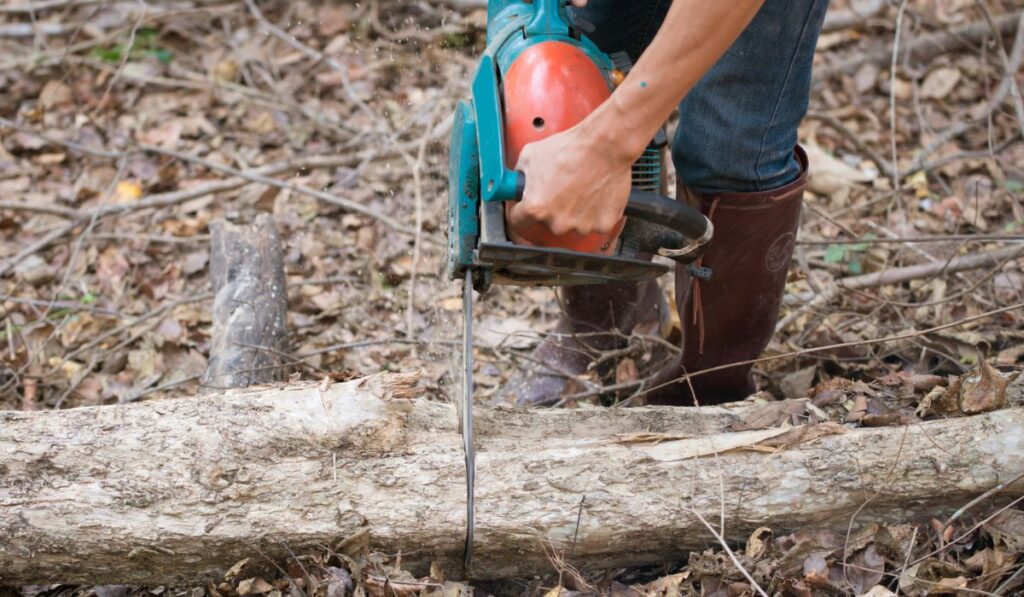
The supplies you need depend on the kind of project you’re working on, the kind of cuts you want to make, and the kind of wood you want to cut. For instance, if you want to cut trees or firewood, you can use a chainsaw (on Amazon).
But if you’re going to undertake a DIY repair project, you’ll likely need to opt for a handsaw (on Amazon) or a circular saw (also on Amazon).
A chisel like this one from AmazonBasics (on Amazon) is also an important tool since it helps achieve more precise cuts and has a sharp edge for carving or cutting. You’ll also need a router if you want to make precise cuts or hollow out material.
And if you want to cut shapes and curves, you’ll need a band saw like this one from Dewalt (on Amazon). It’s also a great option if you want to cut through thick lumber. For precision woodwork and cutting curved or straight lines, you’ll need a jigsaw. Here’s a good jigsaw by Bosch (on Amazon).
You might also need an axe if you want to split logs or cut wood for other purposes. You might also need a plane to flatten or smoothen wood and make the wood pieces smaller, and a crosscut jig or circular saw cutting guide for precision. Other things you might need include measuring tape, sandpaper, clamps, a speed square, and a marking knife.
Determining the Type of Cut You Need
Before you go ahead and start cutting the wood, you first need to determine the kind of cuts you should make. The most common cuts are compound miter cuts, miter cuts, bevel cuts, rip cuts, and crosscuts. All these cuts are used to cut the board either shorter, narrower, or both.
There are some advanced cuts too like resawing where a board is split into half just like a book, but let’s stick to the basics for now.
A crosscut is also referred to as a simple cut. It is made across the board’s width across the grain of wood and is used to shorten the board. Rip cuts are made along the board’s length along the grain of wood and are used to narrow down the board.
A miter cut goes across the board’s width (across the grain of wood) and is also used to shorten the board. Then we have a bevel cut, an angled cut made right on the edge of the board of wood and is used to change the board’s width and length.
Another kind of cut is a compound miter cut that combines both a bevel and miter cut and is needed for installing crown molding. It’s also used for making the piece of wood shorter.
Finding the Right Saw
Once you know the kind of cut you want to make, the next step is choosing the right kind of saw. Some work better for cutting the wood to length, while others are better for narrowing down the board. Let’s take a look at a few different kinds of saws and the kind of cuts they’re best for.
Miter saw

A miter saw is best for making cuts on narrow boards up to 12 inches. You can use them to make a number of cuts, including crosscuts, miter cuts, bevel cuts, and compound miter cuts. You can usually find these saws with a 10- or 12-inch blade. If you want to make cuts on a board wider than 12 inches, it’s better to use some other saw, like a table saw or a circular saw.
A miter saw can also be used to cut angles and make miter cuts on different workpieces for DIY projects such as picture frames. You can also use it to make compound miter cuts as well as to cut bevels on the edges of narrow pieces of wood. You might want to make a bevel cut on moldings like baseboards and trim boards.
Circular saw
A circular saw is great for cutting plywood and panels. It’s also a great tool for cutting boards that are too wide to be cut using a miter saw. You can also use it to rip boards to make them narrower and make nearly any kind of miter cut. You can also use it to make crosscuts with the help of a speed square.
You can also adjust the saw’s bevel and use it for making beveled rip cuts along the board’s length. A circular saw can also be used for compound miter cuts.
Just keep in mind that circular saws don’t come with a fence and it’s quite difficult to make straight cuts with a freehand. This is why it’s better if you get a fence or cutting guide when using this kind of saw.
Table saw
Sometimes, you may need to work on a board that doesn’t have standard dimensions. In such cases, a table saw can help make a rip cut on the board and make it narrower.
You can also use a table saw to cut bevels and crosscuts on plywood or other narrow boards. You can also use it to make miter cuts but since the miter gauge is small, it’s better to use a table saw sled.
Jigsaw
You should opt for a jigsaw if you want to cut circles, shapes, and curves or make straight and short cuts.
Measuring the Wood

Once you know the kind of cut you want to make and the type of saw you need, the next thing you need to do is measure the wood. To do so, you need to know the term kerf. This is basically the width of the cut that a saw makes, and is important to consider when making a cut.
If you measure a board, make a mark on it, and cut on that particular mark, the resulting board will be too short since the kerf will be wider than the mark. Instead, you first need to measure the wood and make a mark on the good side of the board (the side you measured and the one you’ll be using for your project) using a pencil.
The other side of the board is the waste side, and you need to make an “x” here. This mark will help position the blade. All that’s left to do is place the blade on the x. Keep in mind that you can always make a blade shorter, but you can’t make it longer.
Cutting the Wood
Regardless of the saw you have, cutting wood involves a few easy steps. But before you go ahead and start cutting, make sure you wear all your protective equipment, work safely, and follow the instructions provided with your saw.
Step 1: Trim the End
First use a miter saw to square one end of the piece of wood you’re using. This is important to do because the wood that comes from the factory is usually not perfect, and it’s quite hard to find a board that has perfectly square ends. So, start the cutting process by shaving a little bit of wood to make the ends square.
Step 2: Measure the Piece and Make an “X”
Measure the squared piece of wood as described above and mark the good and waste sides of the wood. The “x” you make on the waste side is important to make since it will help position the blade.
Step 3: Position the Blade
Position your blade on the waste side you marked earlier. Make sure you leave the line when making the cut so that you don’t cut off more than necessary. Lower the blade while it’s switched off and position it such that you leave a thickness of about a hair between the line and the teeth.
Step 4: Make the Cut
You can now go ahead and make your cut. To do so, switch on the blade, lower it to make the cut, and let it come to a complete stop before raising it. If you raise it while it’s still spinning, you might end up removing a little bit of wood, which can alter your cut’s length.
Step 5: Check for Adjustments
Measure your workpiece. If all the measurements are correct, then you’re good to go. Otherwise, you need to move to step six if your board is longer or wider than what you want.
Step 6: Make the Necessary Adjustments
If your workpiece is a little longer than what you need, you can use a blade to make small adjustments and cut it to the length you need. Switch off the saw and lower the blade as much as you can into the table. Now gently slide the piece of wood until it makes contact with the side of the blade.
Now with the board in place, raise the blade. If you lower the blade when the saw is switched off, you’ll notice that the teeth will slightly touch the end of the piece of wood. Raise the blade once more, turn on the saw and then lower it to cut it. This way, the blade will cut a very small amount of wood from the board.
Repeat step 5 again. You might need to measure and adjust the board a few times, but you can get the exact length you want in this way.
Important Safety Tips
In addition to wearing your protective equipment, like ear protection, a dust mask, safety glasses, and gloves, there are other safety tips you should keep in mind:
- Ensure that the guard on the saw operates correctly and properly covers the blade when the saw’s cutting head comes back to the rest position.
- Make sure that you hold the piece of wood against the saw’s back fence while cutting. Also, make sure that you provide sufficient support to long pieces of wood so that they don’t end up overbalancing the saw or hitting the blade.
- Never work with any power tools when tired or distracted. Poor concentration causes accidents.
- Never use a blade that has blunt teeth or teeth with tungsten carbide tips. Blunt blades can get stuck or snag in timber, resulting in an accident. Plus, the result is a splintered, rugged cut.
- Never work in wet conditions.
- Take care to keep your hands away from the blade when making a cut.
- Never do any woodwork without wearing safety glasses. You might hit nails or knots in waste timber. And if you’re going to be doing a lot of cutting, it’s better to wear plugs or earmuffs, as well as a mask.
- Always keep the hand saws clean, and get rid of any rust with sandpaper or wool. You should also lubricate it with a candle, petroleum jelly, or light oil.
- Always use sharp pencils so that you get a fine marking line and cut the timber more accurately.
- Timber and softwood in particular tend to swell up in damp, humid conditions, like when they’re kept indoors in an unheated warehouse or garage. This can cause gaps in the paneling or floorboards since they can shrink when they dry up. So, if possible, let the timber dry out for a few indoors before using them.