Hardwood floors are beautiful and durable, but they can also be pretty difficult to keep clean and free of scratches and scuffs. Painting hardwood floors is a great way to give them a fresh new look without having to replace them entirely. So, how do you paint hardwood floors? And what kind of paint should you use?
Use latex or acrylic paint on hardwood floors. Sand, vacuum, and mop the floors, then apply primer and let it dry. Paint the corners and edges with a brush, then use a paint roller to apply two coats of paint to the rest of the floor. Allow the paint to cure before replacing furniture.
Now that you’ve got an idea of how the painting process works, let’s look at the materials you’ll need to paint hardwood floors, and how to go about doing it in more detail. We’ll also consider how long a painted floor typically lasts and the maintenance required to keep it looking its best.
Materials You’ll Need to Paint Hardwood Floors
When painting hardwood floors, you’ll need the following materials:
- Cleaning supplies to prep the floor
- A paint roller designed for painting floors
- Floor paint (semi-gloss or satin finish acrylic or latex paint works well)
- Finish (polyurethane or varnish)
- Painter’s tape
- Drop cloths or tarps
What’s the Best Type of Paint for Hardwood Floors?
The best paint for hardwood floors is latex-based enamel wood paint — a durable paint that resists peeling and flaking and is environmentally friendly.
If you want slightly more durable paint, acrylic-based enamel wood paint is also a good option. However, it’s more expensive because of the chemical-based formula. Nonetheless, it will last longer.
Some options for hardwood floor paint are:
INSL-X Tough Shield Floor and Patio Paint
This acrylic-based paint from XNSL-X (on Amazon) is durable and weather resistant, making it suitable for indoor and outdoor high-traffic areas.
It’s available in Gray Pearl, Light Gray, and Tile Red satin finish, so you can choose the perfect color to match your home décor.
Rust-Oleum Painter’s Touch
The Rust-Oleum Painter’s Touch (on Amazon) latex paint has a low odor and chip resistance, making it suitable for indoor and outdoor use. It’s also quick-drying, meaning you can put your furniture back on the floor faster.
This paint is available in over 20 colors, including Gloss Kona Brown, Satin Nutmeg, and Metallic Oil-Rubbed Bronze, so it’ll be easy to find the perfect one for your home.
KILZ Over Armor Wood Resurfacer Coating
KILZ Over Armor Wood Resurfacer Coating (on Amazon) features an acrylic resin formula that will hide imperfections and conceal splinters and cracks of up to 1/4-inch.
It also creates a smooth, slip-resistant finish that’s durable and easy to clean.
Chocolate Brown, Slate Gray, and Tan are some of the smooth finish colors to choose from so you can find the right one to complement your home.
Other Materials You’ll Need
If your floor has any damage or you want to make the painting process a little easier, here are some additional tools to consider using:
- A paint roller extension handle (on Amazon) to help you reach those difficult areas
- Sandpaper (on Amazon), if the floor has scuff marks — or rent an industrial sander for larger rooms
- Primer, if the floor is unfinished or you want to ensure good paint adhesion
- Hardwood floor patching compound (on Amazon), if any damaged areas need to be repaired
How to Paint Wood Floors
Painting the floor is a big project, so make sure you have plenty of time to devote to it, and that you won’t need to use the room for a while.
You should also open windows and doors to ventilate the area because of the fumes from the paint and finish.
Once you’re ready, follow these steps:
1. Repair Any Damage
Before you paint, it’s vital to repair any damage to the floor. That includes cracks, scratches, dents, and holes. You can use a hardwood floor patching compound to fill in any minor damage.
For larger holes or cracks, you’ll need to use a putty knife to apply the compound, then sand it down once it dries.
If you don’t repair the damage before painting, it may be very noticeable once the paint dries.
2. Sand the Floor
Sanding the floor is optional but doing so will help the paint adhere better and create a smoother finish.
Use fine-grit sandpaper and go with the wood grain if you choose to sand. Wipe away any dust with a tack cloth (on Amazon) before moving on.
If you have a large room, rent an orbital sander to make the job easier. A handheld palm sander will do the trick for smaller spaces or floors.
After sanding, vacuum to remove all the dust from the floor, then wipe down the entire area with a damp cloth to remove any lingering debris.
Some harder wood floors, like Brazilian cherry, can be more difficult to sand. In this case, you can skip this step. But, in general, you should sand the floor before painting for the best results and long-lasting finish.
3. Clean and Prep the Floor
Now that the floor is repaired and sanded (if desired), it’s time to clean it. First, vacuum the entire area to remove dust that may have settled since you finished sanding. Then, use a damp mop or cloth to remove any remaining dirt, grease, or grime.
If the floor still isn’t clean, you can use a TSP solution (on Amazon) to remove any remaining residue. Rinse the floor well after using TSP so it doesn’t damage the wood.
Once the floor is clean, let it dry completely before moving on to the next step.
4. Tape Off Areas You Don’t Want Painted
To avoid accidentally painting areas you don’t want to be painted, tape them off before you start. That includes baseboards, moldings, and any other trim. You’ll also want to put down a drop cloth or tarp to protect nearby surfaces from paint splatters.
Use painter’s or masking tape and press it firmly against the surface, so that paint doesn’t seep underneath.
5. Apply Primer
One of the most critical steps in painting is priming the floor, so don’t skip this part. It will help the paint adhere to the floor, create a smoother finish, and prevent peeling and chipping.
You’ll want to apply two coats to ensure sufficient coverage because the floor will absorb most of the first coat. Let the primer dry completely between coats, following the manufacturer’s instructions.
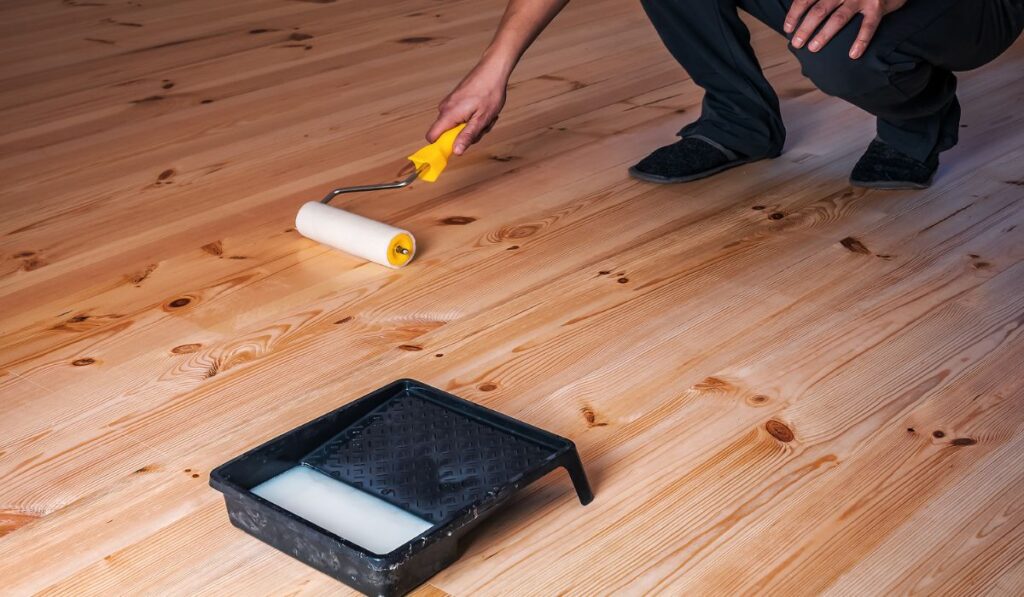
To apply primer, use a brush to cut in around the edges of the room. Then, fill in the rest of the floor with a paint roller. An extender pole helps make this process easier and prevents you from bending over too much.
6. Paint the Floor
After the primer is dry, it’s time to paint the floor. Again, start by cutting in around the edges of the room with a brush. Then fill in the rest of the space with a roller.
Remember, you want to use paint specifically designed for floors because it’s more durable and can better withstand foot traffic. Apply two coats of paint, letting the floor dry completely between each one.
Once the final coat is dry, you can apply a floor sealer to protect the paint and make it last longer.
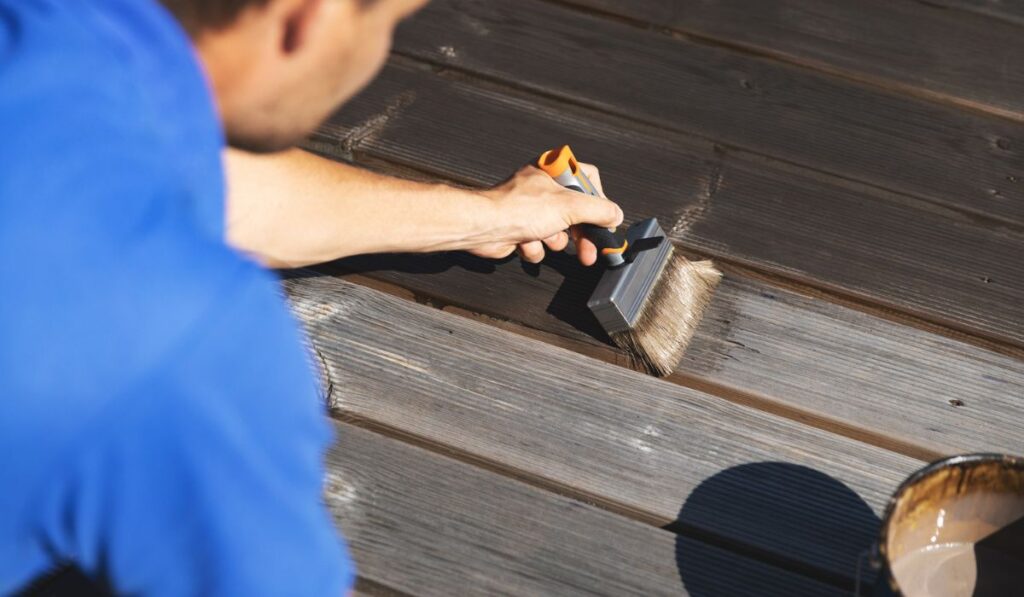
7. Apply a Finish (Optional)
You can apply a finish if you want to add an extra layer of protection to the floor. A finish is optional, but it’s a good idea if the floor will get a lot of traffic.
Water-based polyurethane finishes have a natural appearance and low odor, plus they’re more durable and provide a higher level of protection than an oil-based varnish. Oil-based varnishes are better suited for outdoor projects because they’re more UV-resistant.
To apply the finish, use an applicator pad designed for floor finishes because other types of applicators may leave lint behind.
Dip the applicator in the polyurethane and brush it onto the floor in a W-pattern to cover the entire surface. Allow the finish to dry completely before applying a second coat. After the second coat dries, the floor will be protected from scratches, scuffs, and spills.
8. Allow Paint to Cure
Once the final coat of paint is dry, it’s essential to allow the paint to cure for at least 48 hours before walking on it. Curing can take up to two weeks, so avoid excess traffic during this time.
After the paint has cured, you can move furniture back into the room and enjoy your newly painted floor.
How Long Does a Painted Floor Typically Last?

A painted hardwood floor can last over 10 years with proper care and maintenance. Several factors can affect the longevity of your floor, such as the type of paint used, the quality of the painting job, and how often the floor is used.
High-quality paint, primer, and a well-executed painting job will result in a floor that looks great and lasts for many years.
If your floor gets a lot of traffic and sunlight, it will inevitably show wear and tear sooner than a floor that doesn’t get as much use. However, even a high-traffic floor can last for many years with proper care and maintenance.
To extend the life of your painted hardwood floor, follow these simple tips:
- Sweep or vacuum regularly to remove dirt and debris.
- Wipe up spills immediately.
- Place mats at entryways to catch dirt and grit before it scratches the floor.
- Avoid using harsh cleaners or abrasive pads, which can damage the paint.
Taking good care of your floor can help it last for many years, regardless of how much traffic it gets.