Adding a fresh coat of stain to wood furniture can return it to its glory days or completely transform it. However, there are a few considerations before diving in, regardless of the piece or your skill level.
Thoroughly sanding is crucial. You can use a sanding block or orbital sander. Wipe off any excess dust before staining. Mix your stain and apply it to larger areas first. As you work, go back and wipe extra stains to prevent blotches. Work in a well-ventilated area and wear protection.
Don’t feel intimidated if you’re about to stain your favorite piece of wooden furniture. Whether you’re a veteran or a newbie, this guide will teach you everything you need to get started. Read on for more information.
How Do You Apply Stain to Wood Furniture?
Giving your wood furniture a fresh coat of stain can restore it to its prime or transform it entirely. Most projects can be accomplished in a few hours, regardless if you’re staining a table, chair, or nightstand. However, there are a few precautions to be aware of and tools you’ll need before you begin.
Before You Start
Like any other craft project, preparation is crucial for staining wooden furniture. First, your piece must be sanded to the bare wood so the stain adheres. Excess paint, stain, or coating will impact the final appearance.
Be sure to test your stain on a section of your wooden furniture before you stain the whole piece.
Safety Precautions
Ensure you’re working in a well-ventilated area when using stains or sealants. Breathing protection is necessary, as these chemicals can be hard on the nose, throat, and lungs.
Wooden furniture stains are also difficult to remove from the skin and can cause irritation. Be sure to wear latex or latex-substitute gloves to avoid accidents. It’s also essential to wear eye protection to prevent any backsplash.
Materials and Tools
- Random Orbital Sander (on Amazon)
- Sandpaper (on Amazon)
- Palm Sander (on Amazon)
- Microfiber Staining Pad (on Amazon)
- Paint Can Opening Tool (on Amazon)
- Heavy Duty Shop Vacuum (on Amazon)
- Cleaning Rags (on Amazon)
- Tack Cloth (on Amazon)
- Dropcloth (on Amazon)
- Empty Paint Pail (on Amazon)
- Protective Goggles (on Amazon)
- Safety Mask (on Amazon)
- Latex Gloves (on Amazon)
- Wood Stain
- Clear Coat
Set Up Your Staining Area and Wooden Furniture
Select a well-ventilated area, like in your backyard or an open garage. You’ll want to avoid windy climates, as the wind can mix dust and debris into your project.
Lay a plastic sheet or drop cloth under your wood furniture before you sand. You’ll also want to remove every item from the furniture you don’t plan on sanding. Some items include hinges, knobs, and decorative trim. You can set these items off to the side in a plastic bag.
Sand Your Furniture
Now, you can start to sand your wooden furniture carefully. Start with a sanding block and work by hand. You can use 120-grit sandpaper on refinished pieces and 80-grit for new wood. Lower grit sandpaper makes the wood rougher, allowing more stains to adhere and creating a darker finish.
Afterward, for flat surfaces, you can move onto an orbital sander with fine-grit sandpaper, like 180-grit or 220-grit. Finally, for chair spindles or odd shapes, you can wrap the sandpaper around the surface and sand it by hand.
Remove Any Dust and Debris
After sanding, you’ll want to remove any excess dust or debris. You can use a shop vacuum brush connection if you have one.
Alternatively, you can use a tack cloth, brush, or microfiber cloth to clean the wood surface. Avoid pressing firmly if you use a tack cloth. Pressing too hard can lodge wax into the surface and requires you to sand again.
Prepare Your Work Area
Now you’ll want to remove the piece from your work area. First, remove any plastic sheets or drop cloths to prevent dust from spreading.
You’ll want to replace the plastic layer with a fresh drop cloth or masking contractor material. You can use a few pieces of scrap wood to elevate the piece. Elevating the piece gives you better access to the underside.
Mix Your Stain
Open your can of stain with a can-opening device or screwdriver. Be sure you have latex gloves (on Amazon) to avoid accidents.
Take your stain stirring stick or popsicle stick and slowly stir the stain. Take your time, and avoid shaking the mixture. Once mixed, pour the mixture into your empty paint pail (on Amazon).
Start Staining
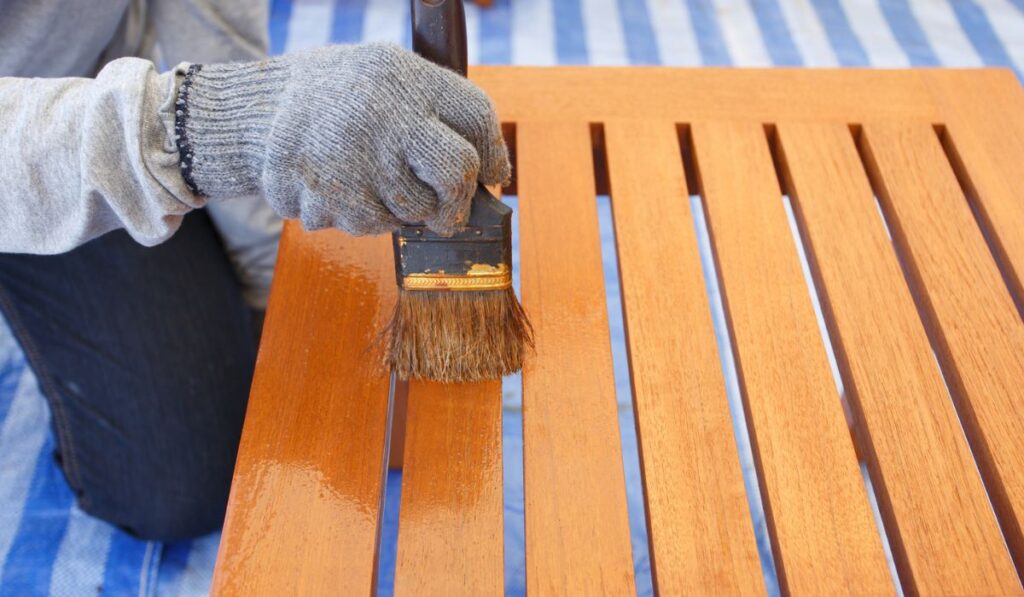
Take your microfiber stain tool (on Amazon) or brush and start staining the furniture. Dip a section of the microfiber in the stain, squeeze out the extra, and apply the stain on the furniture. Start the application on the largest areas and end with the finer points.
Wipe Off the Extra Stain
As you work on the piece, occasionally wipe away the excess stain using a microfiber cloth (on Amazon). Wiping excess stains is crucial, as it will help create a consistent finish without blotches.
Don’t go too far on your piece without wiping off excess. The stain will inevitably absorb into the furniture and create blotches if you aren’t careful. Also, ensure you’re applying in the direction of the wood grain for the best results.
Let Your Piece Dry
Let your wooden furniture dry in a warm, dust-free environment. Most wood stains dry relatively fast, and you can move the piece after a few hours. However, read your stain instructions, as drying times can vary.
Apply a Protective Coating
Once your furniture is completely dry, you can apply a clear protective coat for additional protection. Water and oil-based polyurethane aerosols can help protect the furniture without reducing the appearance of the stain.
Be sure to apply the protective coating in a wind-free environment to avoid overspray. Overspray won’t be visible but can cause a damaged surface that can be fixed with an end sanding with 320-grit or 220-grit sandpaper.
Do You Have to Seal the Wood After Staining?
An additional topcoat of sealant isn’t mandatory but has several benefits. Protective coatings can offer advantages, including:
- Protects the wood from scratches and stains.
- Reduces the chance of fading.
- Can protect the furniture from water or food.
- Some options can protect outdoor pieces from weather and sun damage.
Is it Better to Stain or Paint Wood Furniture?

When starting a new project, you’ll need to decide whether to paint or stain wooden furniture. Each option has advantages, disadvantages, and best use cases. Here’s how to make the best call.
Paint Pieces with Multiple Wood Types
If your furniture uses several wood types, it might benefit from paint instead of stain.
The various types of wood will absorb the stain differently and create an uneven appearance. Paint can create a consistent finish for these pieces.
Look for Damage
Stain works well for wooden furniture if you can easily sand out damage, scratches, or flaws. The right stain and sanding can easily hide imperfections. However, you’ll usually need to paint the piece if there is significant damage.
Think About the Details
Be sure to consider the details of your wooden furniture.
The wood stain might not be the best option if your piece has intricate trim, designs, or details. Removing the previous stain from small details can be time-consuming and difficult. Instead, paint can work better as you can easily cover the details.